Regardless of the type of cycling you are doing, saddle position is a crucial feature to get right. The position of the saddle entails three things – saddle height, saddle tilt, and saddle fore-aft position. In this article, we will take a look at the fore-aft position of the saddle in detail. Why it is important, what are the symptoms of a bad fore-aft position, and how we can adjust it.
Why correct saddle position is important
The position of the saddle is very important as it helps determine the comfort level of the bike. If the saddle is not placed correctly, it can lead to a bunch of problems. These problems include muscle imbalances, feet numbness, knee pain, wrist pain, back pain, and overuse injuries. While on short rides everything might feel fine, you will start seeing some of these problems after long periods of use. Furthermore, you will not be able to deliver your best performance with an incorrect saddle position. So now that you are convinced of the importance of saddle position, let’s see how we can achieve the proper fore-aft position of the saddle.

Before adjusting saddle fore-aft position
Before you start fiddling with the saddle rails, there are other more important factors to consider. We are talking about the bike size, saddle height, and saddle tilt. You have to get these right first. Oftentimes, the problems that you are facing are due to one of these three things being wrong, instead of the saddle’s fore-aft position.
Bike Size and Fit: This is the frame size and it will be different for people of different heights. There are two aspects to look out for here – standover height and reach. You should be able to put both feet flat on the ground when you dismount the seat, with a clearance of around 2-3 inches between the top tube and your perineum (standover height). When you sit on the bike and reach for the handlebars, your shoulders should be relaxed and have only a slight bend in the elbows (reach).
Saddle Height: If the saddle is too low, you will overwork the quadriceps. If it is too high, you will be swinging side-to-side on the saddle and stretch the hamstrings too much. In both cases, an excess amount of strain is placed on the knees and they can start to hurt. With the proper saddle height, your legs should not extend more than about 90% of full extension during the entire stroke.
Saddle Tilt: This is again something that can cause a lot of discomfort. The exact tilt of the saddle will depend on your riding style. For lots of uphill climbing you want to tilt the saddle slightly forward to keep the weight on the front wheel. During downhill descents, the saddle should be tilted backward. However, for most riders, a perfectly horizontal saddle feels the most comfortable.
How to set up saddle fore-aft position properly
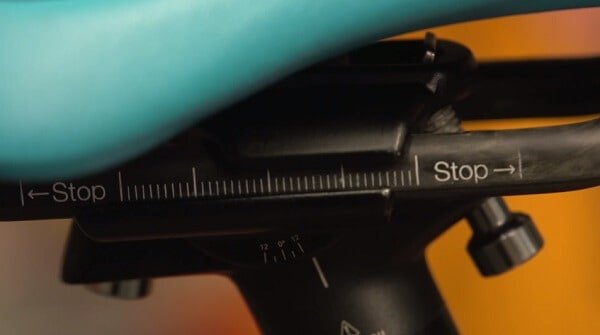
Now, if all the previous parameters have been adjusted and you still feel discomfort, we can take a closer look at the saddle fore-aft position. Unfortunately, there is no one method for this which can be considered to be the end all be all. However, there are two popular methods that you could follow, both of which work quite well. These are the Knee Over Pedal Spindle or KOPS methods, and the Center of Gravity or COG method. It is best to carry out these methods on a bike trainer.
Knee Over Pedal Spindle (KOPS)
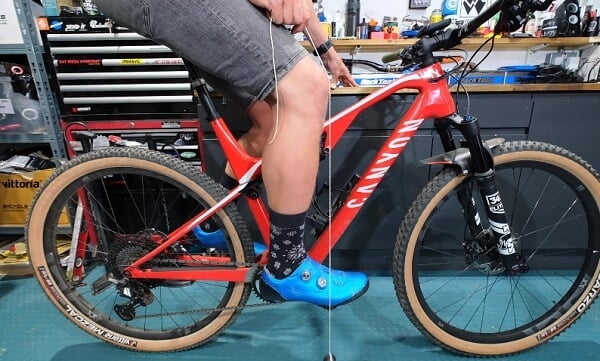
The Knee Over Pedal Spindle or KOPS method is a very simple method. It’s not the best method but it is good enough to give you a general idea. It’s pretty self-explanatory. You put one pedal at the 3 o’clock position and put your corresponding foot on it. Now, if you hang a plumb line from the front of your knee, it should align with the spindle of the pedal. This is considered to be a neutral position, and from this you can make very small adjustments according to riding style until it feels just right.

Center of Gravity (COG)
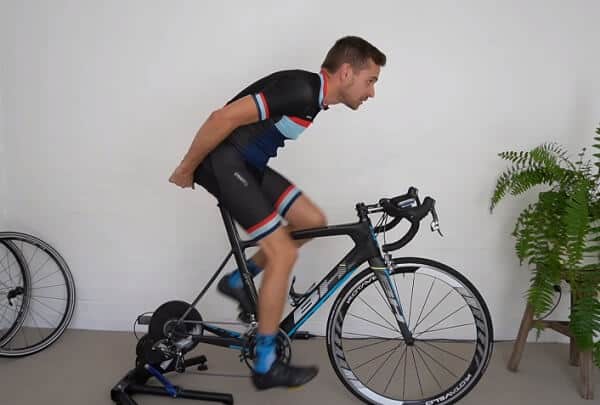
The Center of Gravity, also known as the Balance Test method, has grown in popularity in recent days. In this method, you first have to set up your saddle to the proper height. Then you start pedaling on the bike at a cadence you would normally use in drops. Once you warm up and get going, try to let go of the handlebars and swing your hands behind your hips. When the saddle is at the correct fore-aft position, you should be able to maintain the posture without straining your core muscle or increasing your cadence. If you do increase cadence or start to fall over when you let go of the handlebars, you should adjust the saddle’s fore-aft position until that does not happen.

Signs that the saddle is not in the right position
When the saddle is too far back, you will find yourself stretching to reach the handlebars. This might cause problems in your back, especially the scapula. Since in this position mainly you are pushing forwards with your legs during the pedal stroke, you will experience some pain in your upper hamstrings. This is the result of them being overworked and overstretched. Additionally, you might get numbness in your feet from “toeing” your pedals.

Conversely, when the saddle is too far forward, you will feel cramped as the handlebars are too close. In this position, you will put too much of your weight on your hands and possibly develop wrist pain. Moreover, your quads will be overworked and get burned out easily. This creates a muscle imbalance between your hamstrings and quads. In both scenarios, forward and backward, you are sure to develop some sort of knee pain.
Frequently Asked Questions
Q1. How do I set up the proper saddle height?
Ans.: If you want your saddle height to be as perfect as can be, there is a somewhat complicated method for which you will need help from an expert. However, the famous “heel” rule is a much simpler way that works relatively well. For this method, you put on your regular cycling shoes and get on your bike. With the pedal at the 6 o’clock position, place the heel of your foot on it. The saddle height should be such that your leg is fully extended in this position. So now when you place your foot normally on the pedal, there will be the right amount of bend in your knee.
Q2. What is the best saddle angle for mountain biking?
Ans.: A horizontal saddle position is a good starting point. For most riders, no changes are needed to be made to the saddle tilt. However, if you do a lot of climbing, you will be benefited by tilting the nose of the saddle down. This helps you keep weight on the front wheel. The best saddle angle for climbing is around 5 – 15 degrees. The actual value will depend on the slope you are riding on. On the other hand, when riding downhill, the saddle should be tilted upwards by about 10 – 15 degrees for better stability.
Q3. Is the position of the cleats important?
Ans.: Unlike with road biking, the technicality of mountain biking and the smaller cleat sizes mean that the positioning of the cleats is not something to ignore. Fixing the cleats in a forward position improves your acceleration but reduces stability. Brining the cleats rearward provides greater stability and maximum torque but decreases your ability to accelerate as fast.
A rearward cleat position is favourable for downhill riding as you can put more of your weight on the pedals by rotating your heels downwards. The lateral positioning of cleats can also be varied which will move your knees inward or outward. Ultimately, the optimum cleat position will depend on your own preferences.
Conclusion
This should prove to you that the fore-aft position of a mountain bike saddle is nothing too complex. Most people can set it themselves without the help of others. Just remember to also ensure that the height and tilt of your saddle, as well as your bike fit is perfect. And once you find the right setup, your rides will be many times more enjoyable.
